Quick answer
An AI under-eye analyzer can help you review visible under-eye darkness, puffiness, shadowing, skin tone differences, and photo conditions from a clear selfie. It is most useful when you use it as a progress tool, not as a medical diagnosis or a harsh attractiveness score.
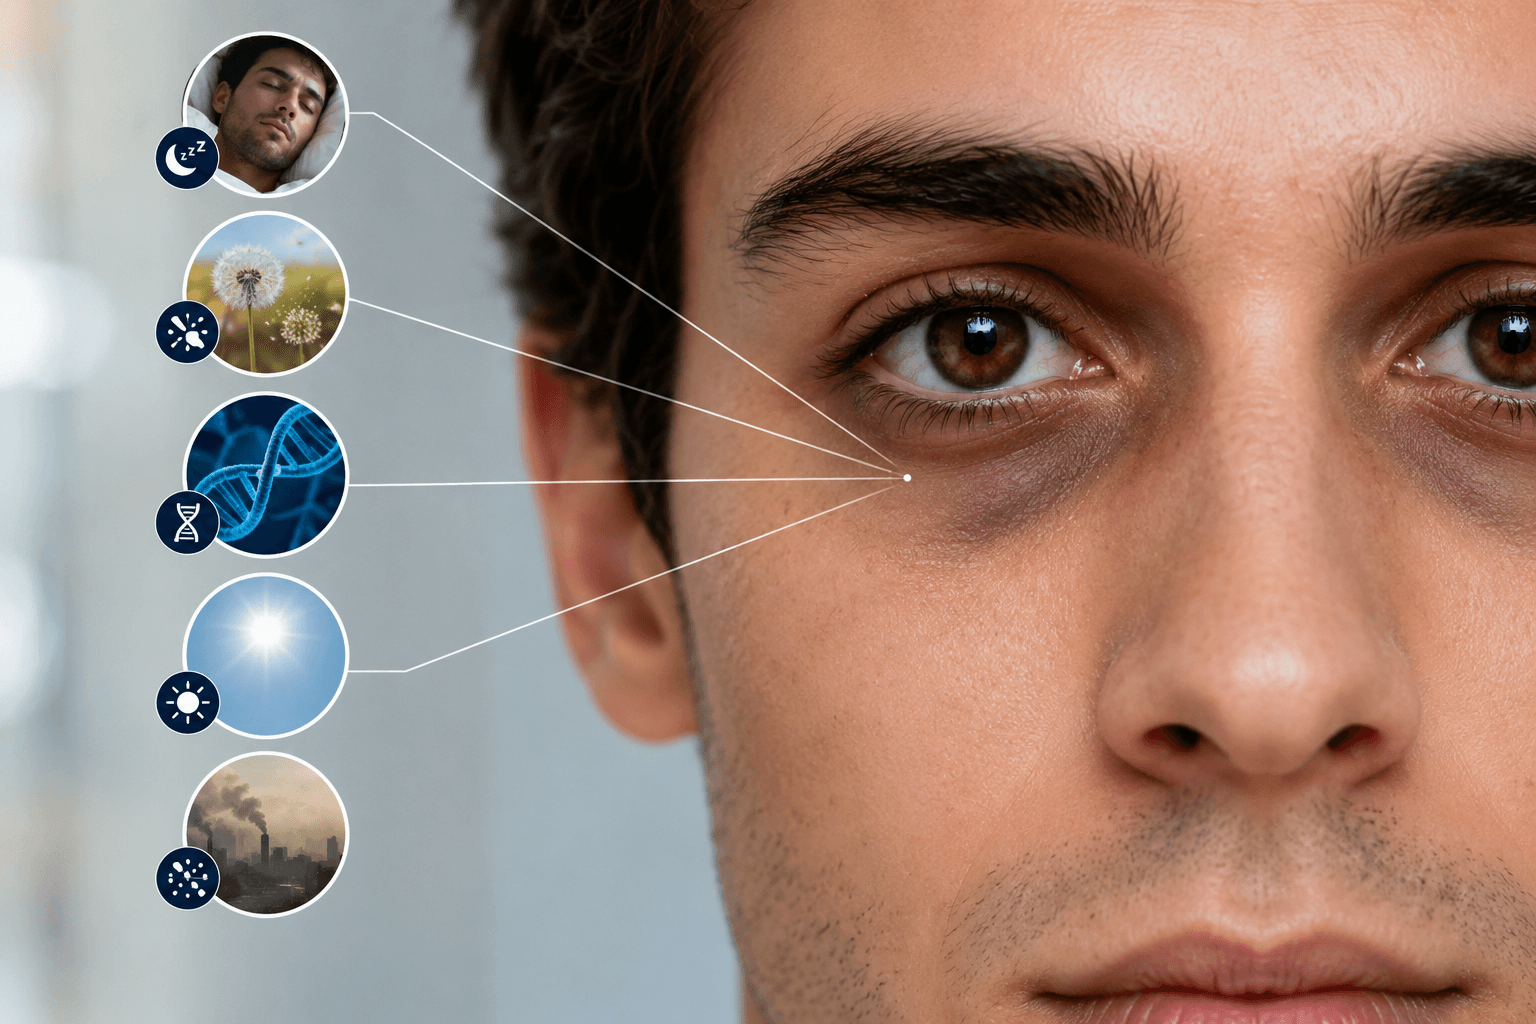
Under-eyes are tricky because the same person can look rested in soft window light and exhausted under harsh bathroom lighting. Shadows from the brow, tear troughs, camera angle, sleep, dehydration, allergies, eye rubbing, and genetics can all change how the under-eye area appears. A good analyzer should separate what is clearly visible from what might simply be a lighting issue.
What an AI under-eye analyzer checks
A useful under-eye scan looks at the area below each eye and asks a few practical questions.
Is there visible darkness compared with the surrounding cheek skin? Is the darkness symmetrical or stronger on one side? Is there puffiness, hollowing, or a shadow line? Does the image contain overhead shadows that could exaggerate dark circles? Is the face tilted, squinting, smiling, or looking down? Is the photo sharp enough to compare over time?
The goal is not to say “you look tired.” The goal is to identify the most likely visible issue: pigmentation, shadowing, puffiness, dehydration-looking dullness, allergy-looking rubbing, or simply bad light.
Why under-eye photos are easy to misread
The under-eye area is one of the first places where bad lighting creates false signals. Overhead light casts a shadow under the brow. Side light can make one eye look darker than the other. A low camera angle can deepen the tear trough. A close selfie can distort the midface and make puffiness look more obvious.
This is why a scan should score photo quality before scoring your face. If the photo is not fair, the result should say so. A useful result might say: “Your under-eye darkness is visible, but the overhead lighting is likely exaggerating it. Retake with front-facing window light before comparing progress.”
How to take the best under-eye scan photo
Use indirect daylight or a soft light source in front of your face. Keep the camera at eye level. Look straight ahead with a neutral expression. Avoid heavy concealer, beauty filters, sunglasses, wet skin, extreme smiles, and dramatic chin angles.
If you are tracking improvement, use the same location, same time of day, same camera, and same distance. Under-eyes change with sleep, hydration, salt intake, allergies, stress, and skincare irritation, so one scan is just a snapshot. A trend across several fair photos is more useful.
How to interpret your result
A good result should give you a short priority list instead of a vague score.
Example:
- Main signal: mild under-eye darkness
- Possible photo factor: slight overhead shadow
- First fix to test: front-facing light and consistent sleep schedule
- Retest: 7 to 14 days with the same setup
This keeps the result actionable. If the scan says the main issue is shadowing, better lighting and camera angle may matter more than buying another eye cream. If the scan shows puffiness, lifestyle tracking may be more useful than treating it as pigmentation. If the darkness is persistent and one-sided, swollen, painful, or suddenly new, do not rely on a cosmetic scan alone.
What the analyzer cannot tell you
An AI under-eye analyzer cannot diagnose allergies, anemia, eczema, dehydration, sleep disorders, thyroid problems, or any other medical condition. It cannot know your genetics, medication, sleep quality, diet, or whether you rubbed your eyes before the photo. It also cannot fully correct a bad photo.
Use it as a private mirror with structure: it can show what is visible, help you retake better photos, and make progress less emotional.
A simple 14-day under-eye tracking plan
Take one baseline scan in fair lighting. Write a short note about sleep, allergies, alcohol, salty food, eye rubbing, and skincare. For two weeks, do not change five things at once. Pick one variable: sleep schedule, hydration consistency, sunscreen around the eye area, allergy management, or reducing irritation.
Retake the scan after 7 to 14 days under the same conditions. Compare the trend, not a single image. The best result is not a perfect score. The best result is knowing what actually changed.
Run a private AI under-eye scan on GlowUpFace.